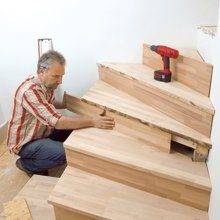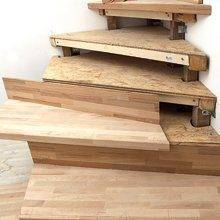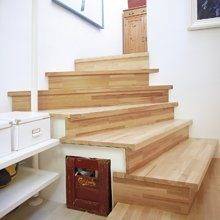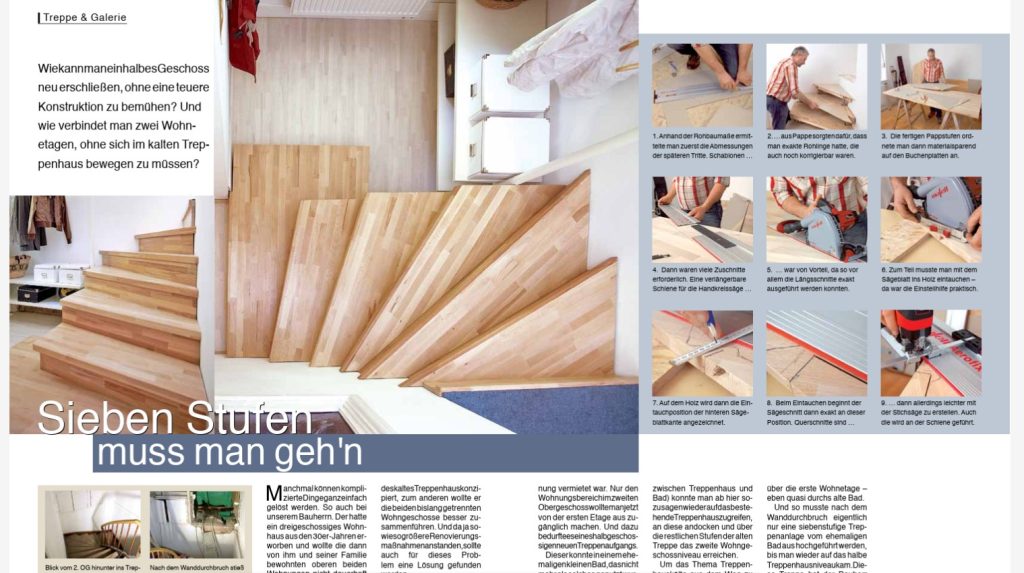
Wie kann man ein halbes Geschoss neu erschließen, ohne eine teuere Konstruktion zu bemühen? Und wie verbindet man zwei Wohnetagen, ohne sich im kalten Treppenhaus bewegen zu müssen? Hier erfahren Sie es!
Schritt 1 – Abmessung ermitteln
Anhand der Rohbaumaße ermittelte man zuerst die Abmessungen der späteren Tritte. Schablonen …
Schritt 2 – Papprohlinge erstellen
… aus Pappe sorgten dafür, dass man exakte Rohlinge hatte, die auch noch korrigierbar waren.
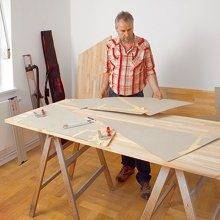
Schritt 3 – Pappstufen anordnen
Die fertigen Pappstufen ordnete man dann materialsparend auf den Buchenplatten an.
Schritt 4 – Zuschnitt
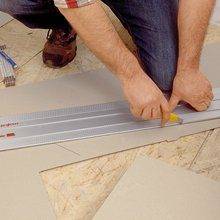
Dann waren viele Zuschnitte erforderlich. Eine verlängerbare Schiene für die Handkreissäge
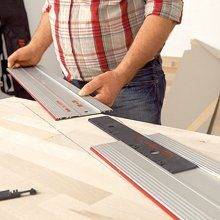
Schritt 5 – Verlängerbare Schiene
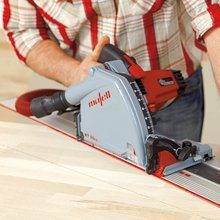
… war von Vorteil, da so vor allem die Längsschnitte exakt ausgeführt werden konnten.
Schritt 6 – Einstellhilfe sollte die Säge haben
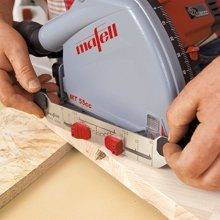
Zum Teil musste man mit dem Sägeblatt ins Holz eintauchen – da war die Einstellhilfe praktisch.
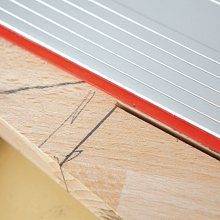
Schritt 7 – Eintauchposition anzeichnen
Auf dem Holz wird dann die Eintauchposition der hinteren Sägeblattkante angezeichnet.
Schritt 8 – In der Markierung Sägen
Beim Eintauchen beginnt der Sägeschnitt dann exakt an dieser Position. Querschnitte sind …
Schritt 9 – Stichsäge für Querarbeiten
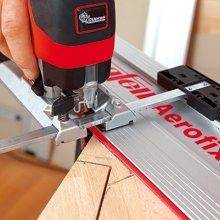
… dann allerdings leichter mit der Stichsäge zu erstellen. Auch die wird an der Schiene geführt.
Schritt 10 – Stufen anschrauben
Die Stufen hat man nun hinten auf dem Unterbau angeschraubt, um sie herunterzudrücken und …
Schritt 11 – Stellbrett ausmessen
… die Höhe der Stellbretter ermitteln zu können. Die Schrauben werden von diesen verdeckt.
Schritt 12 – Stellbretter prüfen
Setzstufen vorn etwas anheben, Stellbretter einschieben und die Vorderkanten unten anreißen.
Schritt 13 – Stufen nochmals bearbeiten
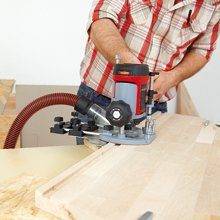
Denn an den Unterseiten der Stufenüberstände werden Nuten für die Stellbretter eingefräst.
Schritt 14 – Stellbrett anlegen
Dann hat man die Setzstufen gewendet und die Stellbretter entlang der Markierungslinie angelegt.
Schritt 15 – Senkrechte Schlitze
Mit der Lamellofräse schlitzte man nun vier- bis fünfmal senkrecht in die Stufenplatte ein.
Schritt 16 – Waagrechte Schlitze
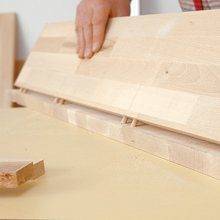
Ebenso oft an gleicher Position waagerecht in die Kante des Stellbretts. Denn die Verbindung zwischen senkrechtem Brett und Stufe …
Schritt 17 – Verbindung über Flachdübel
… erfolgte mit sogenannten Flachdübeln. Der hintere Über- stand verschwindet im Unterbau
Schritt 18 – Schräg ansägen
Vor dem Einleimen sägte man die Stellbretter wandseitig entsprechend des Winkels schräg ab.
Schritt 19 – Runddübelverbindungen
Für das obere Stellbrett hat man randnah mögliche Runddübelverbindung vorgezogen.
Schritt 20 – Leiste anbringen
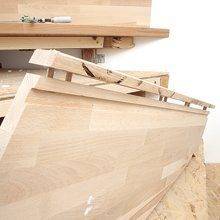
Die letzte Stufe mit Stellbrett liegt, als überstehende Kante hat man hier eine Leiste aufgeleimt.
Schritt 21 – Restliche Leisten fertigen
Auch die restlichen Stufenkantenleisten hat man sich aus 18er-Platten zurechtgeschnitten.
Schritt 22 – Abschärfen
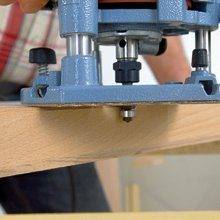
Die Leistenkanten wurden mit der Oberfräse leicht angefast, um deren Schärfe abzumildern.
Schritt 23 – Mit dübeln verbinden
Die Leisten wurden ebenfalls per Runddübel mit den Stufenplatten verbunden bzw. verleimt.
Schritt 24 – Stufenwinkel verklebt
Die zusammengebauten Stufenwinkel wurden von unten nach oben auf der Rohtreppe verklebt.
Schritt 25 – Überblick
Blick von der Seite in Richtung Treppenhausdurchbruch. Das Möbel oben steht vor der neuen Abmauerung hin zum kalten Treppenhaus.
Schritt 26 – Letzte Kontrolle
Wissen wie’s geht: Die Stellbretter sollten senkrecht zwischen den Setzstufen eingebracht werden und später auch so fixiert sein. Um den 90-Grad-Winkel überprüfen zu können, ist es hilfreich, sich zum Beispiel ein rechtwinkeliges Brett anzufertigen, das dann als Winkelschablone eingesetzt wird.
Weitere Informationen
Stufenplattendicke: 30 mm Stellbretter: 18 mm, Kantenhöhe: 40 mm Stufenhöhe: 190 mm, Stufentiefe im Hauptgehbereich: 300 mm Podestplattenfläche: 1200 x 800 mm, Handkreissäge, Stichsäge, Dübel-fräse und Oberfräse sind von Mafell.
Dieser Modus ermöglicht es Menschen mit Epilepsie, die Website sicher zu nutzen, indem das Risiko von Anfällen, die durch blinkende oder blinkende Animationen und riskante Farbkombinationen entstehen, eliminiert wird.
Sehbehindertenmodus
Verbessert die visuelle Darstellung der Website
Dieser Modus passt die Website an die Bequemlichkeit von Benutzern mit Sehbehinderungen wie Sehschwäche, Tunnelblick, Katarakt, Glaukom und anderen an.
Kognitiver Behinderungsmodus
Hilft, sich auf bestimmte Inhalte zu konzentrieren
Dieser Modus bietet verschiedene Hilfsoptionen, um Benutzern mit kognitiven Beeinträchtigungen wie Legasthenie, Autismus, CVA und anderen zu helfen, sich leichter auf die wesentlichen Elemente der Website zu konzentrieren.
ADHS-freundlicher Modus
Reduziert Ablenkungen und verbessert die Konzentration
Dieser Modus hilft Benutzern mit ADHS und neurologischen Entwicklungsstörungen, leichter zu lesen, zu surfen und sich auf die Hauptelemente der Website zu konzentrieren, während Ablenkungen erheblich reduziert werden.
Blindheitsmodus
Ermöglicht die Nutzung der Website mit Ihrem Screenreader
Dieser Modus konfiguriert die Website so, dass sie mit Screenreadern wie JAWS, NVDA, VoiceOver und TalkBack kompatibel ist. Ein Screenreader ist eine Software für blinde Benutzer, die auf einem Computer und Smartphone installiert wird und mit der Websites kompatibel sein müssen.
Lesbare Erfahrung
Inhaltsskalierung
Standard
Textlupe
Lesbare Schriftart
Legasthenie-freundlich
Markieren Sie Titel
Links hervorheben
Schriftgröße
Standard
Zeilenhöhe
Standard
Buchstaben-Abstand
Standard
Optisch ansprechendes Erlebnis
Einfarbig
Hoher Kontrast
Hohe Sättigung
Niedrige Sättigung
Einfache Orientierung
Bilder ausblenden
Lesehilfe
Animationen stoppen
Lesemaske
Markieren Sie Schweben
Fokus hervorheben
Großer dunkler Cursor
Großer Lichtcursor
Kognitives Lesen
Virtuelle Tastatur
Navigationstasten
Sprachnavigation
Accessibility Statement
www.renovieren.de
19. Juni 2025
Compliance status
We firmly believe that the internet should be available and accessible to anyone, and are committed to providing a website that is accessible to the widest possible audience,
regardless of circumstance and ability.
To fulfill this, we aim to adhere as strictly as possible to the World Wide Web Consortium’s (W3C) Web Content Accessibility Guidelines 2.1 (WCAG 2.1) at the AA level.
These guidelines explain how to make web content accessible to people with a wide array of disabilities. Complying with those guidelines helps us ensure that the website is accessible
to all people: blind people, people with motor impairments, visual impairment, cognitive disabilities, and more.
This website utilizes various technologies that are meant to make it as accessible as possible at all times. We utilize an accessibility interface that allows persons with specific
disabilities to adjust the website’s UI (user interface) and design it to their personal needs.
Additionally, the website utilizes an AI-based application that runs in the background and optimizes its accessibility level constantly. This application remediates the website’s HTML,
adapts Its functionality and behavior for screen-readers used by the blind users, and for keyboard functions used by individuals with motor impairments.
If you’ve found a malfunction or have ideas for improvement, we’ll be happy to hear from you. You can reach out to the website’s operators by using the following email
Screen-reader and keyboard navigation
Our website implements the ARIA attributes (Accessible Rich Internet Applications) technique, alongside various different behavioral changes, to ensure blind users visiting with
screen-readers are able to read, comprehend, and enjoy the website’s functions. As soon as a user with a screen-reader enters your site, they immediately receive
a prompt to enter the Screen-Reader Profile so they can browse and operate your site effectively. Here’s how our website covers some of the most important screen-reader requirements,
alongside console screenshots of code examples:
Screen-reader optimization: we run a background process that learns the website’s components from top to bottom, to ensure ongoing compliance even when updating the website.
In this process, we provide screen-readers with meaningful data using the ARIA set of attributes. For example, we provide accurate form labels;
descriptions for actionable icons (social media icons, search icons, cart icons, etc.); validation guidance for form inputs; element roles such as buttons, menus, modal dialogues (popups),
and others. Additionally, the background process scans all the website’s images and provides an accurate and meaningful image-object-recognition-based description as an ALT (alternate text) tag
for images that are not described. It will also extract texts that are embedded within the image, using an OCR (optical character recognition) technology.
To turn on screen-reader adjustments at any time, users need only to press the Alt+1 keyboard combination. Screen-reader users also get automatic announcements to turn the Screen-reader mode on
as soon as they enter the website.
These adjustments are compatible with all popular screen readers, including JAWS and NVDA.
Keyboard navigation optimization: The background process also adjusts the website’s HTML, and adds various behaviors using JavaScript code to make the website operable by the keyboard. This includes the ability to navigate the website using the Tab and Shift+Tab keys, operate dropdowns with the arrow keys, close them with Esc, trigger buttons and links using the Enter key, navigate between radio and checkbox elements using the arrow keys, and fill them in with the Spacebar or Enter key.Additionally, keyboard users will find quick-navigation and content-skip menus, available at any time by clicking Alt+1, or as the first elements of the site while navigating with the keyboard. The background process also handles triggered popups by moving the keyboard focus towards them as soon as they appear, and not allow the focus drift outside it.
Users can also use shortcuts such as “M” (menus), “H” (headings), “F” (forms), “B” (buttons), and “G” (graphics) to jump to specific elements.
Disability profiles supported in our website
Epilepsy Safe Mode: this profile enables people with epilepsy to use the website safely by eliminating the risk of seizures that result from flashing or blinking animations and risky color combinations.
Visually Impaired Mode: this mode adjusts the website for the convenience of users with visual impairments such as Degrading Eyesight, Tunnel Vision, Cataract, Glaucoma, and others.
Cognitive Disability Mode: this mode provides different assistive options to help users with cognitive impairments such as Dyslexia, Autism, CVA, and others, to focus on the essential elements of the website more easily.
ADHD Friendly Mode: this mode helps users with ADHD and Neurodevelopmental disorders to read, browse, and focus on the main website elements more easily while significantly reducing distractions.
Blindness Mode: this mode configures the website to be compatible with screen-readers such as JAWS, NVDA, VoiceOver, and TalkBack. A screen-reader is software for blind users that is installed on a computer and smartphone, and websites must be compatible with it.
Keyboard Navigation Profile (Motor-Impaired): this profile enables motor-impaired persons to operate the website using the keyboard Tab, Shift+Tab, and the Enter keys. Users can also use shortcuts such as “M” (menus), “H” (headings), “F” (forms), “B” (buttons), and “G” (graphics) to jump to specific elements.
Additional UI, design, and readability adjustments
Font adjustments – users, can increase and decrease its size, change its family (type), adjust the spacing, alignment, line height, and more.
Color adjustments – users can select various color contrast profiles such as light, dark, inverted, and monochrome. Additionally, users can swap color schemes of titles, texts, and backgrounds, with over seven different coloring options.
Animations – person with epilepsy can stop all running animations with the click of a button. Animations controlled by the interface include videos, GIFs, and CSS flashing transitions.
Content highlighting – users can choose to emphasize important elements such as links and titles. They can also choose to highlight focused or hovered elements only.
Audio muting – users with hearing devices may experience headaches or other issues due to automatic audio playing. This option lets users mute the entire website instantly.
Cognitive disorders – we utilize a search engine that is linked to Wikipedia and Wiktionary, allowing people with cognitive disorders to decipher meanings of phrases, initials, slang, and others.
Additional functions – we provide users the option to change cursor color and size, use a printing mode, enable a virtual keyboard, and many other functions.
Browser and assistive technology compatibility
We aim to support the widest array of browsers and assistive technologies as possible, so our users can choose the best fitting tools for them, with as few limitations as possible. Therefore, we have worked very hard to be able to support all major systems that comprise over 95% of the user market share including Google Chrome, Mozilla Firefox, Apple Safari, Opera and Microsoft Edge, JAWS and NVDA (screen readers).
Notes, comments, and feedback
Despite our very best efforts to allow anybody to adjust the website to their needs. There may still be pages or sections that are not fully accessible, are in the process of becoming accessible, or are lacking an adequate technological solution to make them accessible. Still, we are continually improving our accessibility, adding, updating and improving its options and features, and developing and adopting new technologies. All this is meant to reach the optimal level of accessibility, following technological advancements. For any assistance, please reach out to
Sie sehen gerade einen Platzhalterinhalt von Google Maps. Um auf den eigentlichen Inhalt zuzugreifen, klicken Sie auf die Schaltfläche unten. Bitte beachten Sie, dass dabei Daten an Drittanbieter weitergegeben werden.